Prerequisites
The aemserver user
must be configured in Adobe Campaign. The aemserver is a technical
user that will be used to connect the AEM server to Adobe Campaign.
Go to Administration > Users
& Security > Users, and select the aemserver user.
Click it to open the user settings.
·
You must set a password for this user. This cannot be done
through the UI. This configuration must be done in REST by a technical
administrator.
·
You can assign specific roles to this user, such as deliveryPrepare,
which allows the user to create and edit deliveries.
If you do not have administration
role in Adobe Campaign. You still need password of aemserver user. To get
password of aemserver user please send a request email to
You must
configure an external account that allows you to connect Adobe Campaign to your
AEM instance.
Make sure AEM Instance you are using for integration with Adobe
Campaign is hosted on pubic or hosted on cloud. If you are trying to integrate
your local AEM instance with Adobe Campaign, then make sure it is public
hosted.
To Host Local AEM Instance Pubic Please follow below steps.
2. Extract the
folder, right click on ngrok.exe and run as administrator.
3. On command prompt, please put command ngrok http 4502
5.
Copy the URL which is redirecting to http or http and use it to
create external account in the Adobe Campaign console mentioned in the next
step.
To configure an AEM external
account:
2. Select the
default aemInstance external account or create a new one by
clicking the Create button.
3. Select Adobe
Experience Manager in the Type field and enter the
access parameters used for your AEM authoring instance: server address, account
name and password.
Note:
Be sure that you do not add an ending / slash
at the end of the URL or the connection will not work.
 |
| AEM External Account in ACS Console |
The AEMResourceTypeFilter option
is used to filter types of AEM resources that can be used in Adobe Campaign.
This allows Adobe Campaign to retrieve AEM contents that are specifically
designed to be used in Adobe Campaign only.
This option comes pre-configured; however, if you change this
option, it may lead to a non-functioning integration.
1. Go to Administration > Application
settings > Options.
2. In the list,
you can ensure that the AEMResourceTypeFilter option is listed
and that the paths are correct.
By default, the AEM feature is
not enabled in Adobe Campaign's email templates. You can configure a new email
delivery template that will be used to create emails with AEM content.
To create an AEM-specific email delivery template:
1. Go to Resources > Templates > Delivery
templates.
2. Enable selection by clicking the checkmark in the action bar
and selecting the existing Standard email (mail) default
template, then duplicate it by clicking the Copy icon
and clicking Confirm.
3. Disable the
selection mode by clicking the x and open the newly created Copy
of Standard email (mail) template, then select Edit
properties from the action bar of the template dashboard.
You can modify the template's Label.
4. In the
properties Content section, change the Content source to Adobe
Experience Manager. Then select the external account that was previously
created and click Confirm.
Save your modifications by
clicking Confirm and clicking Save.
 |
| AEM Specific Email Delivery Template |
Configuring Adobe Experience Manager
·
Configure replication between instances.
·
Connect AEM to Adobe Campaign.
·
Configure the externalizer.
Content created from the AEM
authoring instance is first sent to the publishing instance. This publishing
instance then transfers the content to Adobe Campaign. The replication agent
must therefore be configured to replicate from the AEM authoring instance to
the AEM publishing instance.
Note:
If you do not want to use the replication URL but instead use
the public-facing URL, you can set the Public URL in the
following configuration setting in the OSGi (Tools > Web
Console > OSGi Configuration > AEM Campaign Integration
- Configuration):
Public URL: com.day.cq.mcm.campaign.impl.IntegrationConfigImpl#aem.mcm.campaign.publicUrl
This step is also necessary to
replicate certain authoring instance configurations into the publishing
instance.
 |
| Replication agent settings to make connection between AEM and ACS |
Note:
Avoid using localhost (that is a local copy of AEM)
when configuring your integration with Adobe Campaign unless the publish and
author instance are both on the same computer.
2. Click Edit then
select the Transport tab.
3. Configure the
URI by replacing localhost with the IP address or the address
of the AEM publishing instance.
 |
| Replication agent settings to make connection between AEM and ACS |
Connecting AEM to Adobe Campaign
Before you can use AEM and Adobe
Campaign together, you must establish the link between both solutions so that
they can communicate.
1. Connect to your
AEM authoring instance.
 |
| Adobe Campaign Cloud Services Configuration |
3. Create a new
configuration by entering a Title and click Create, or
choose the existing configuration that you want to link with your Adobe
Campaign instance.
4. Edit the
configuration so that it matches the parameters of your Adobe Campaign
instance.
· Username: aemserver, the Adobe Campaign AEM
Integration package operator used to establish the link between the two
solutions.
·
Password: Adobe Campaign aemserver operator password. You may have to
re-specify the password for this operator directly in Adobe Campaign.
·
API End Point: Adobe Campaign instance URL.
Note:
 |
| Adobe Campaign Settings in AEM |
Note:
If the connection fails, make
sure you check the following:
·
You may encounter a certificate problem when using a secure
connection to an Adobe Campaign instance (https). You will have to add the
Adobe Campaign instance certificate to the cacerts file of
your JDK.
You need
to configure the externalizer in AEM on
your author instance. The Externalizer is an OSGi service that lets you
transform a resource path into an external and absolute URL. This service provides
a central place to configure those external URLs and build them.
See Configure the externalizer for
general instructions. For the Adobe Campaign integration, make sure you
configure the publish server at http://<host>:<port>/system/console/configMgr/com.day.cq.commons.impl.ExternalizerImpl not point
to localhost:4503 but to a
server that is reachable by the Adobe Campaign console.
 |
| Adobe Campaign - Externalizer Configuration in AEM |
Push AEM
Content to ACS
Create Email Content in AEM
1.
Create campaign content inside /content/campaigns
path
2.
Create a Brand page inside /content/campaigns
path using Brand Template
3.
Create an Area page inside
/content/campaign/<brandpage> path using Area Template
4.
Create a Campaign page inside
/content/campaign/<brandpage>/<areapage> path using Campaign
Template
5.
Open the Campaignpage properties, goto ‘Cloud
Services’ tab and select the cloud configuration from the dropdown.
6. Create a ‘emailcontentpage’ inside /content/campaign/<brandpage>/<areapage>/<campaignpage> path using Adobe Campaign Standard Template
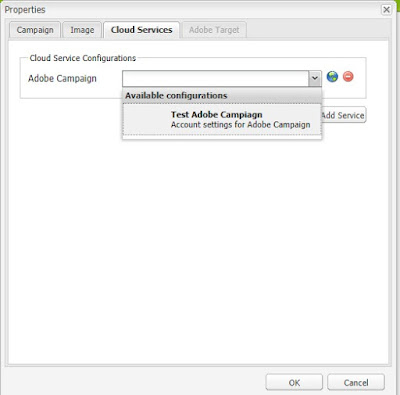 |
| Campaign Page in AEM Setup |
6. Create a ‘emailcontentpage’ inside /content/campaign/<brandpage>/<areapage>/<campaignpage> path using Adobe Campaign Standard Template
7.
Open the ‘emailcontentpage’ properties, enter
details as per below screenshots.
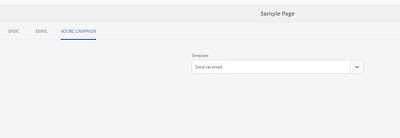 |
| campaign page in aem page properties |
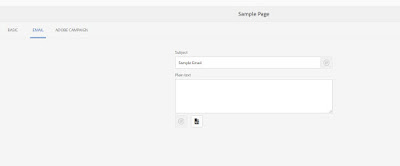 |
| campaign page in aem page properties |
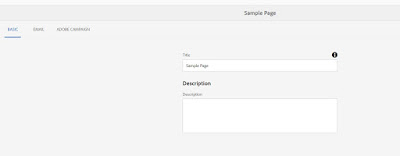 |
| campaign page in aem page properties |
8.
Open the email content page, page layout will be
displayed as below.
9. Once you click on + icon to insert a component
on page, 7 OOOB components will be listed in the side kick.
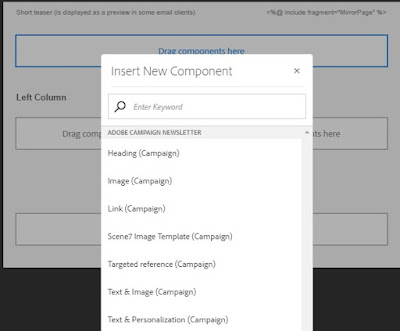 |
| Campaign Components List in AEM |
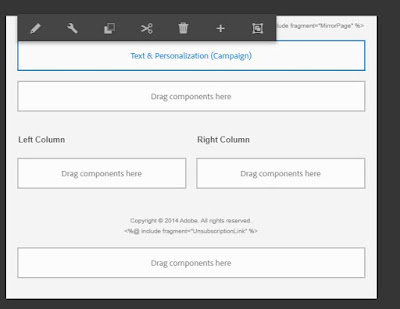 |
| Text and Personalization Component in AEM |
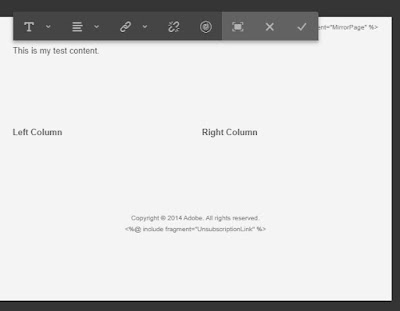 |
| Personalize Campaign Icon |
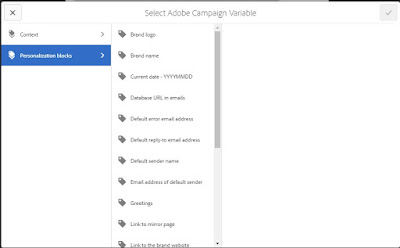 |
| personalize adobe campaign variables |
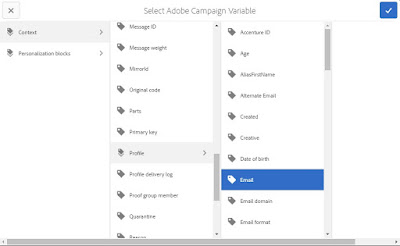 |
| personalize adobe campaign variables |
 |
| output post personalize adobe campaign variables |
1.
Click on ‘Start Workflow’ and select ‘Approve
for Adobe Campaign’ from list.
2.
After completion the workflow steps, Status
‘Approved’ will be displayed on the page.
 |
| Status Approved |
3.
Go to Adobe Campaign and open the Delivery
Template which was created in this document above.
4.
Click on the ‘Use the default editor’ section.
5.
Click on ‘AEM’ link displayed on the screen
below.
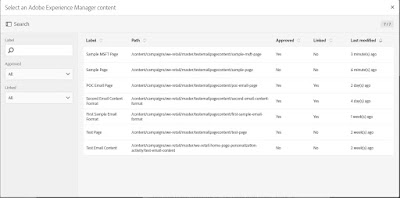
6.
List of AEM contents will be listed as per below
screenshot.


Cool ...
ReplyDeleteVery descriptive..